
Introduction
RingCentral is a cloud-based communication platform that makes it easy to call, message, and hold video meetings—all in one place. Salesforce, on the other hand, is a powerful CRM tool that helps businesses manage and organize customer information. When you bring RingCentral and Salesforce together, the experience becomes seamless you can make and receive calls directly inside Salesforce, automatically log call details, and keep everything connected. This integration saves time, reduces manual work, and helps teams stay more productive while focusing on what matters most—building stronger customer relationships.
Prerequisites
- Salesforce Administrator access.
- Active RingCentral account.
- Supported Salesforce edition.
- Google Chrome or Firefox browser.
- Permission to install apps from AppExchange.
Installation and Setting up the Call Center
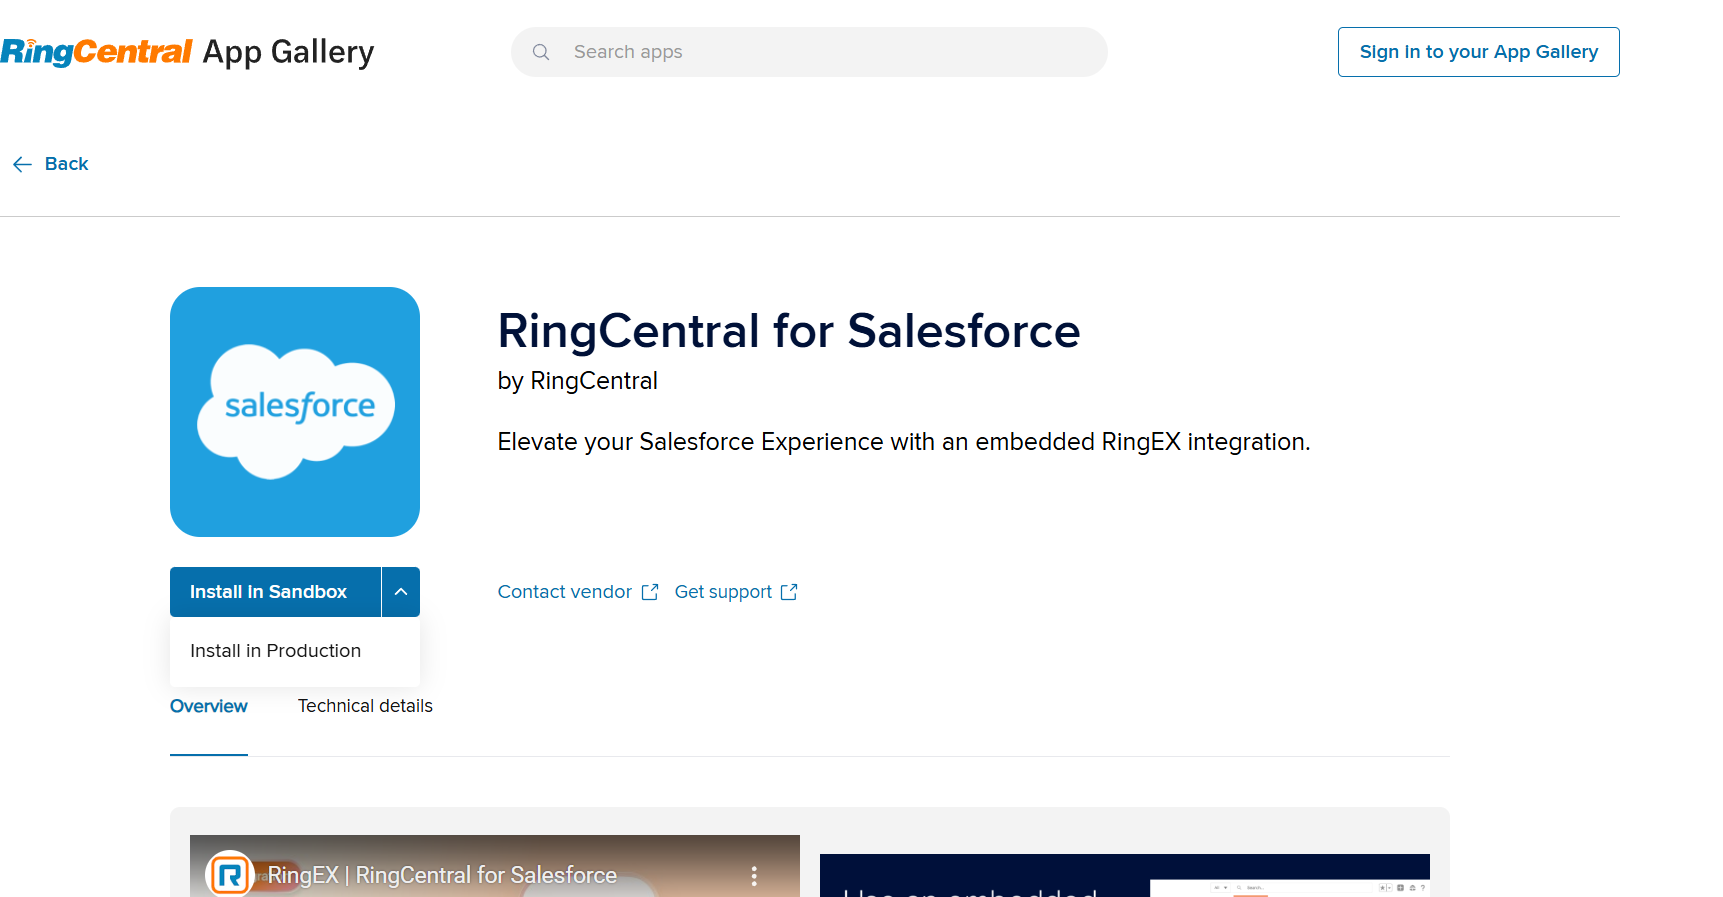
Step 1: Install RingCentral for Salesforce App
-
Choose the environment:
- Production (for real org).
- Sandbox (for testing).
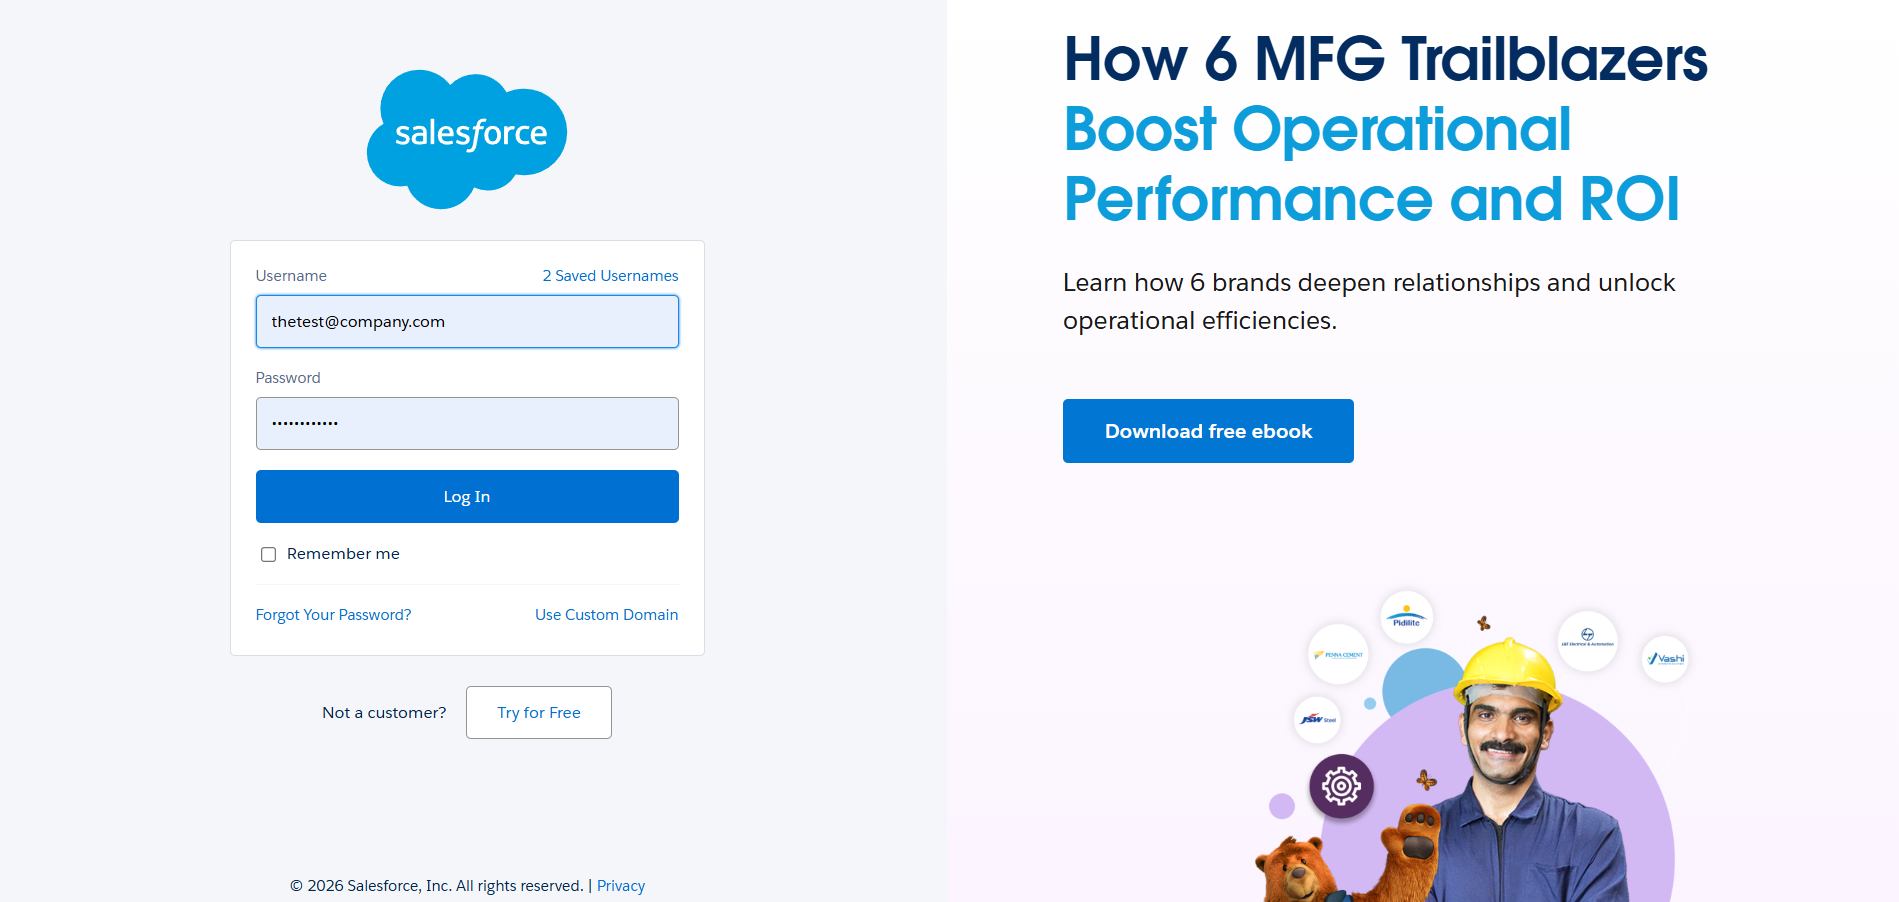
- Log in as Salesforce Administrator.
-
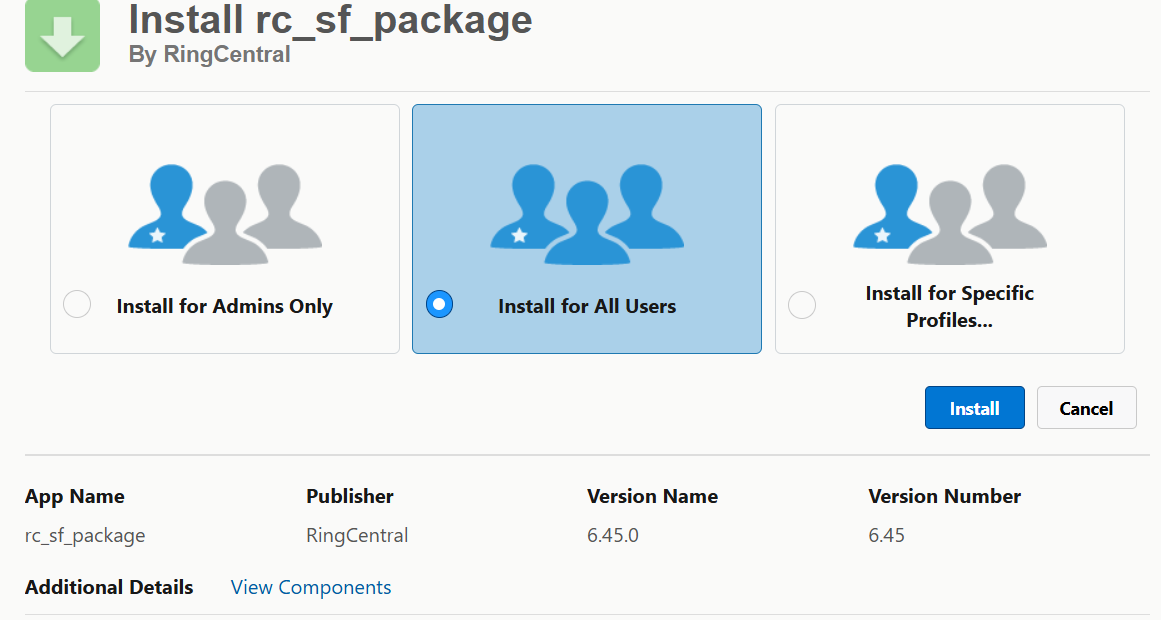
Select Install for All Users.
-
Click Install and wait for installation to complete.
NOTE: Selecting this option ensures configuring the call center will go smoothly.
- Click Done.
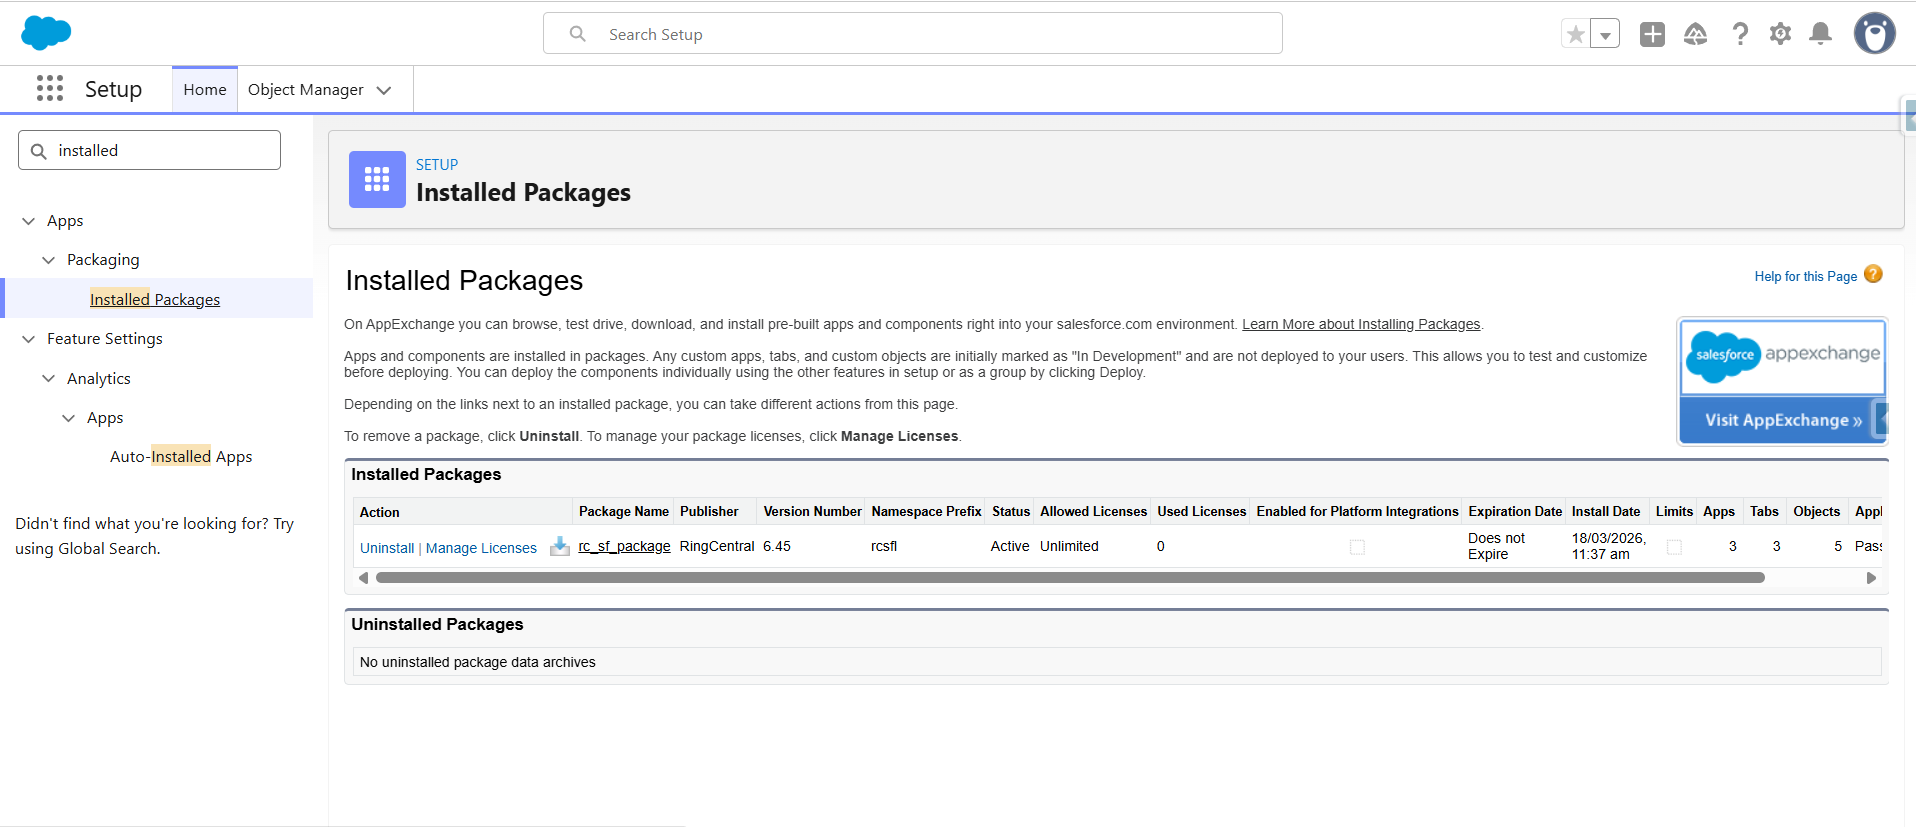
After the installation the RingCentral for Salesforce application will be listed as "rc_sf_pachage"
Step 2: Add Users to the Call Center
- Go to Set Up in your org.
- Search Call Center
- Click Call Center
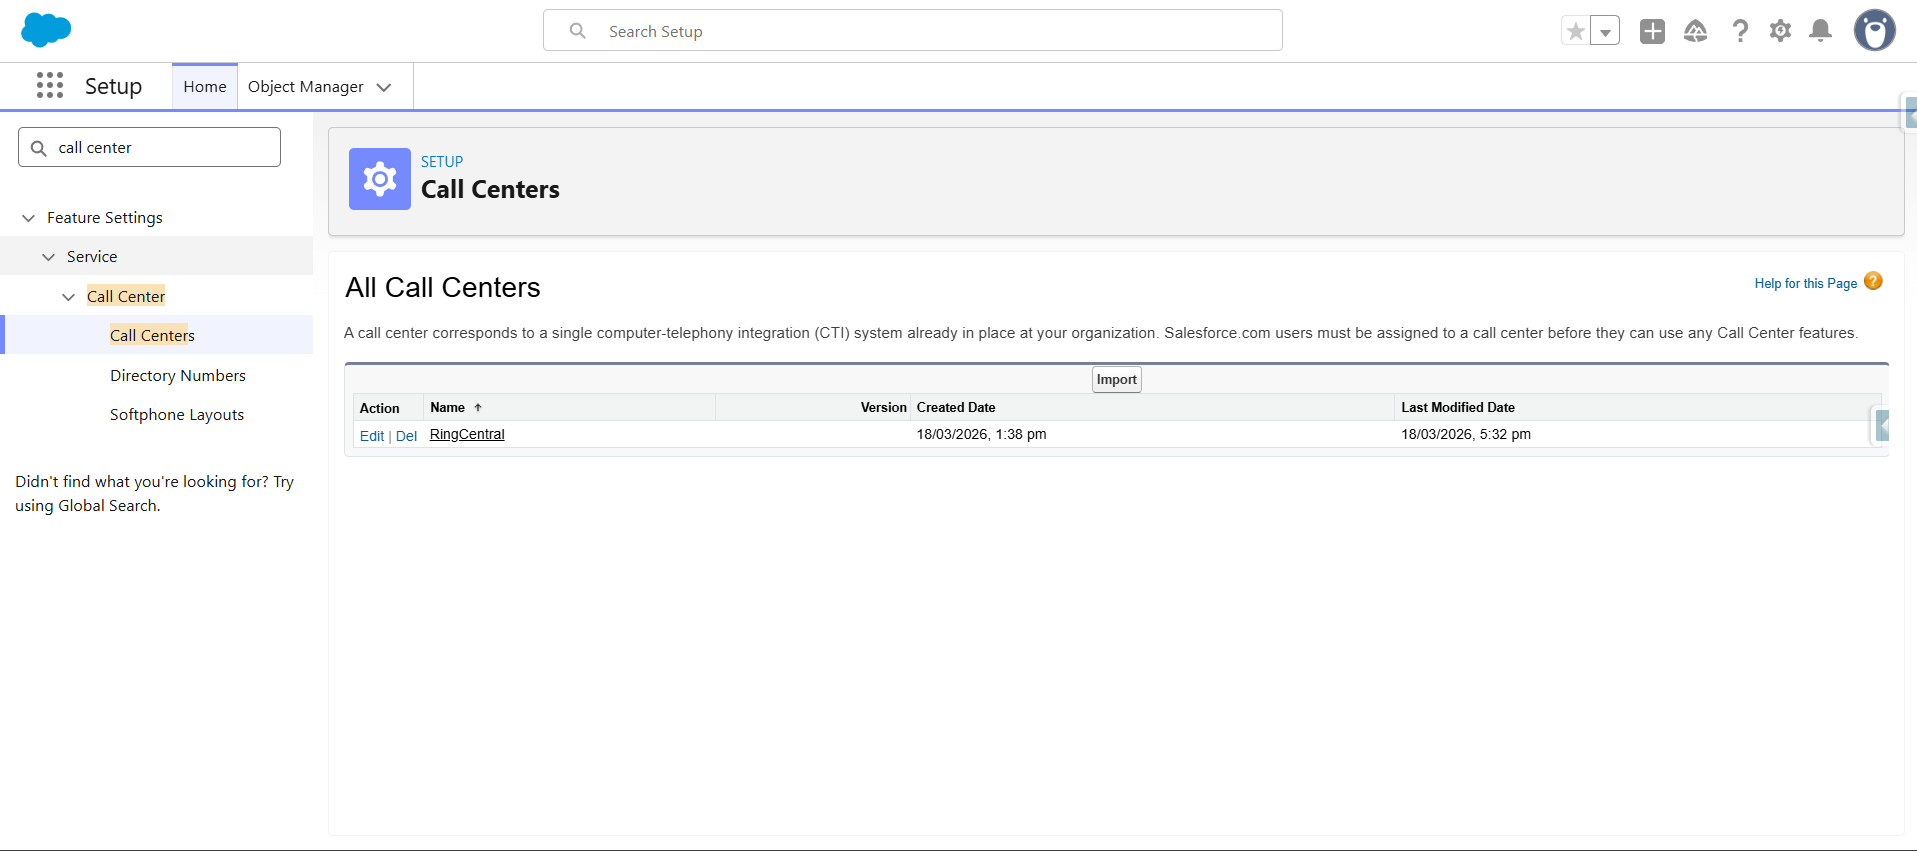
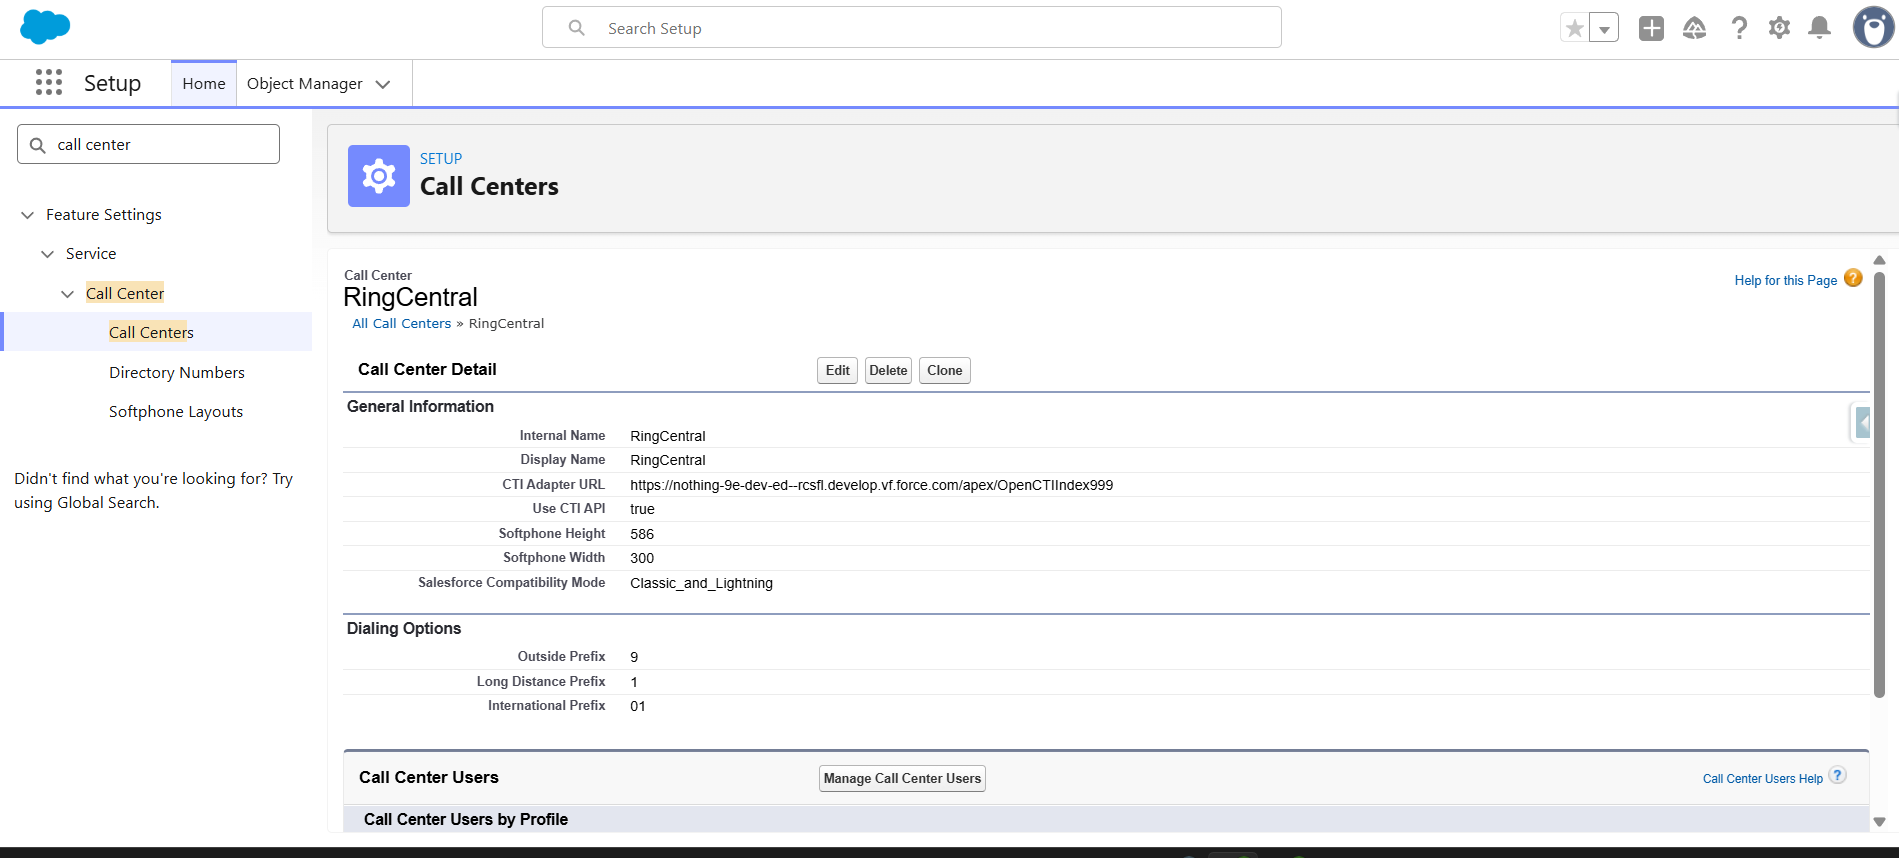
Select the call center and click on RingCentral. Please Note the name could be different say "RingCentral" depending on the salesforce version.
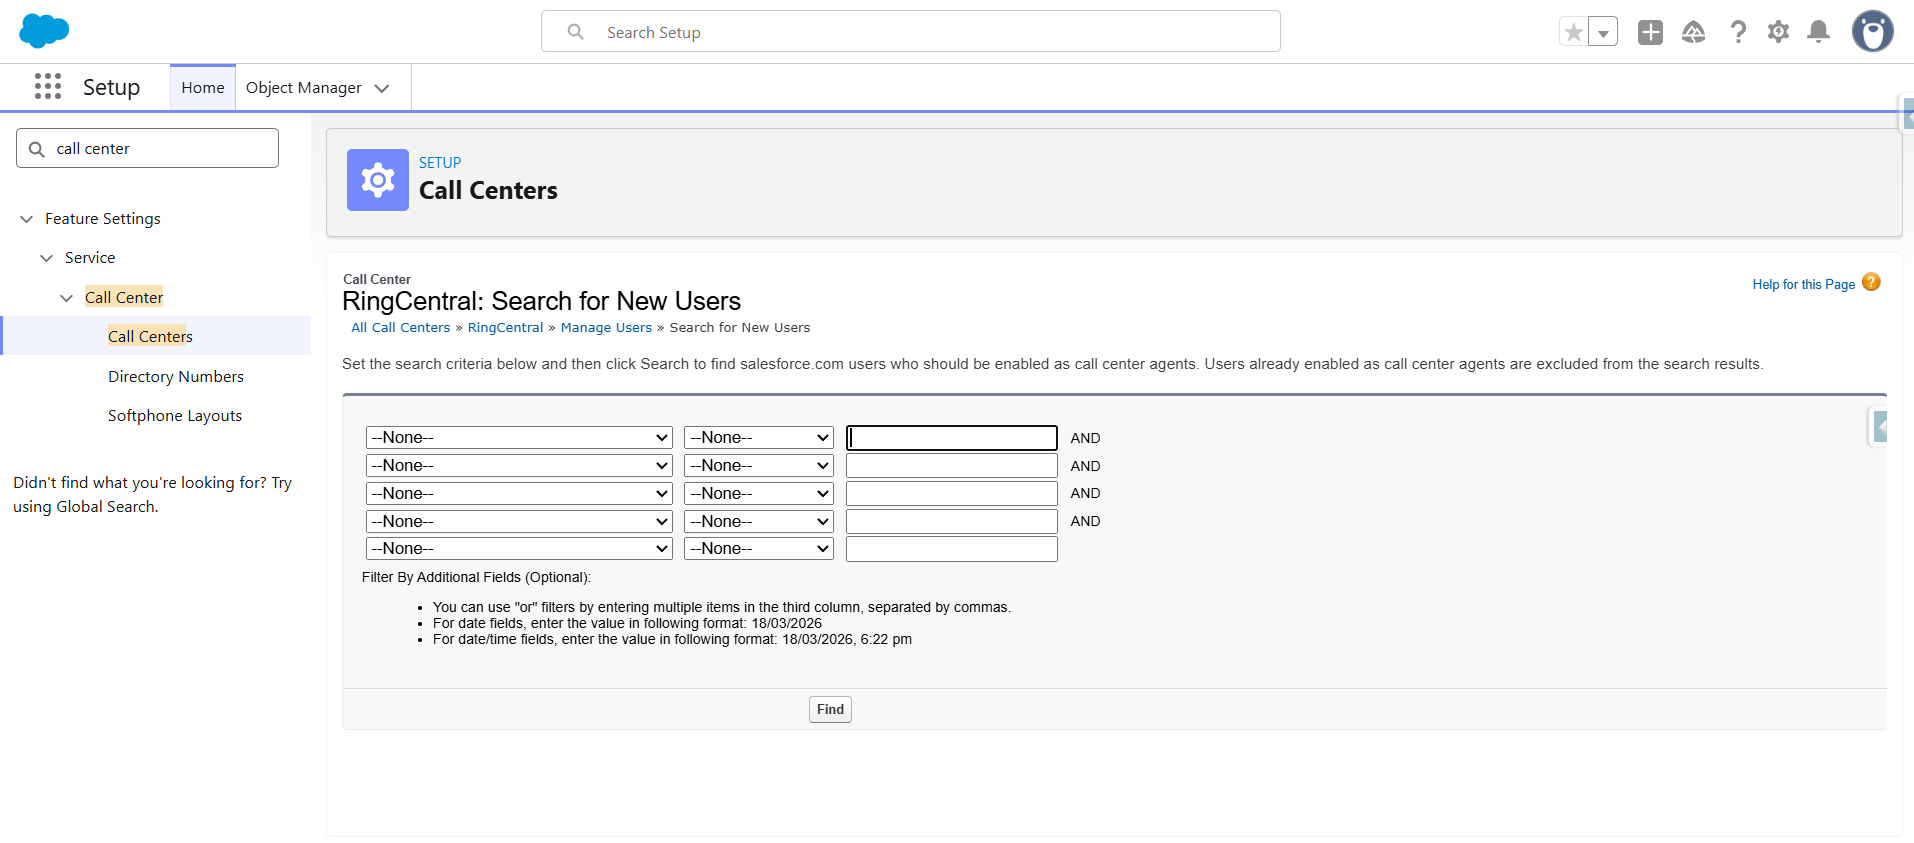
Select the Users you wish to add to the call center.
Setting Up SoftPhone Layouts in Salesforce
Step 1: Set up a SoftPhone Layout
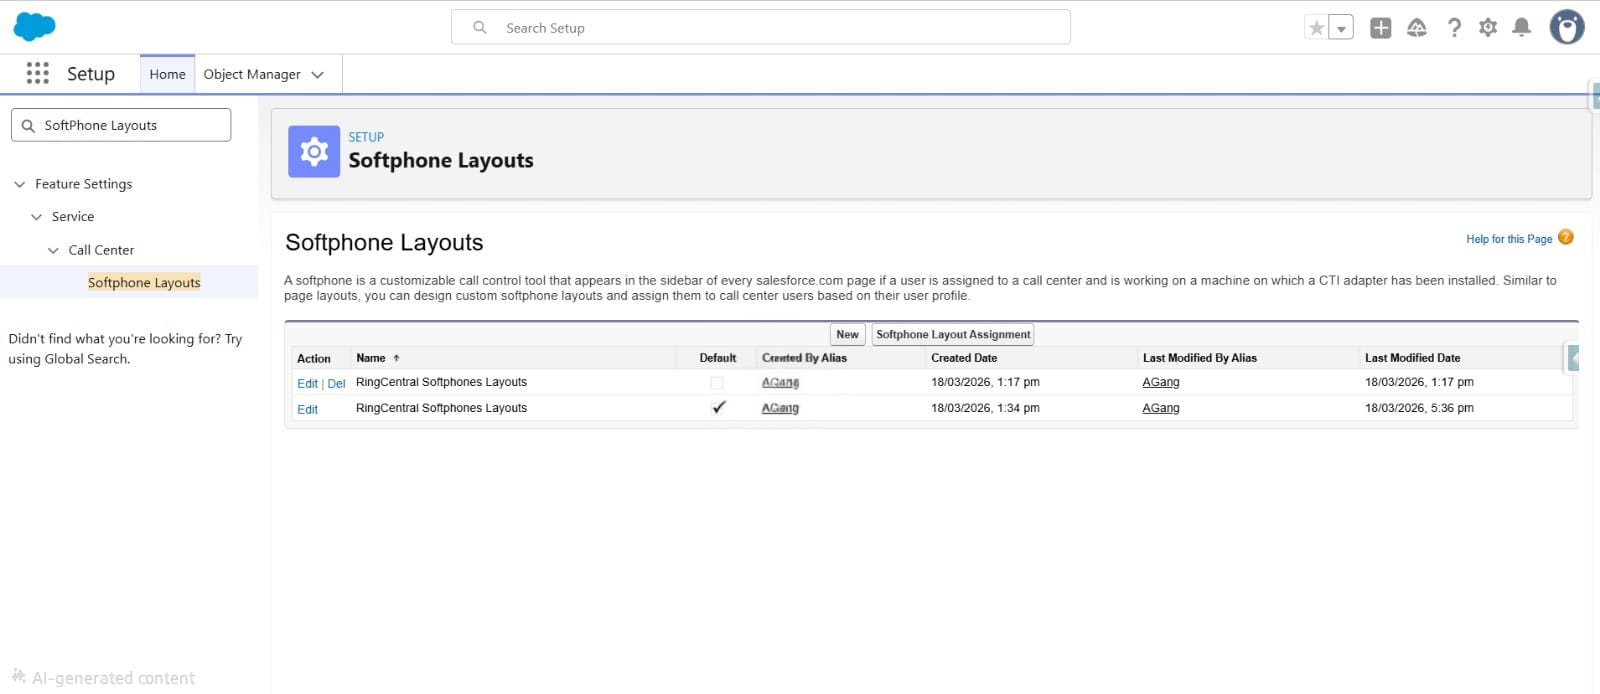
From the lefthand side menu , go to Set Up and search SoftPhones Layouts and click the New button.
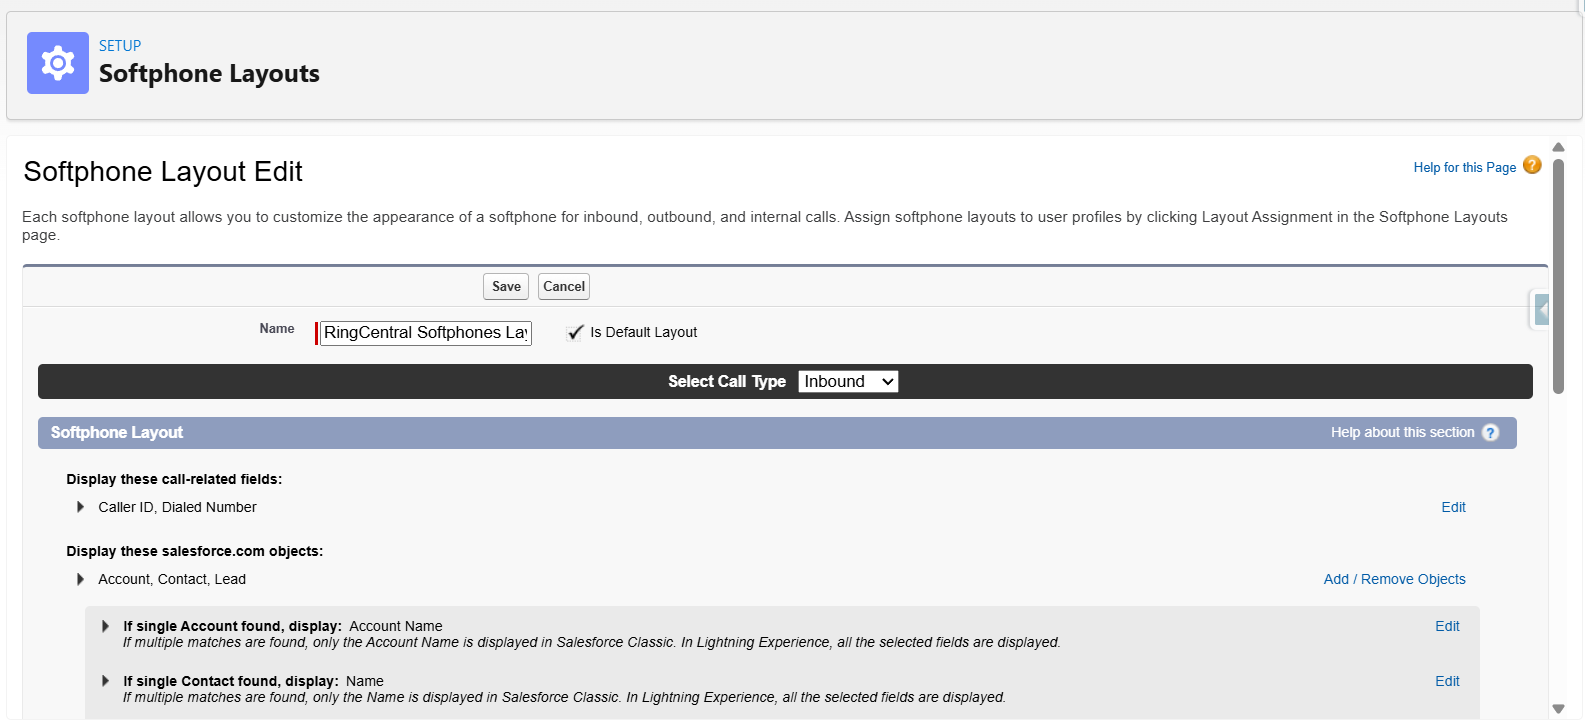
In the Name Field, fill the "RingCentral Softphones Layouts" and select the Is Default Layout checkbox if you want this layout to be the default for all users.

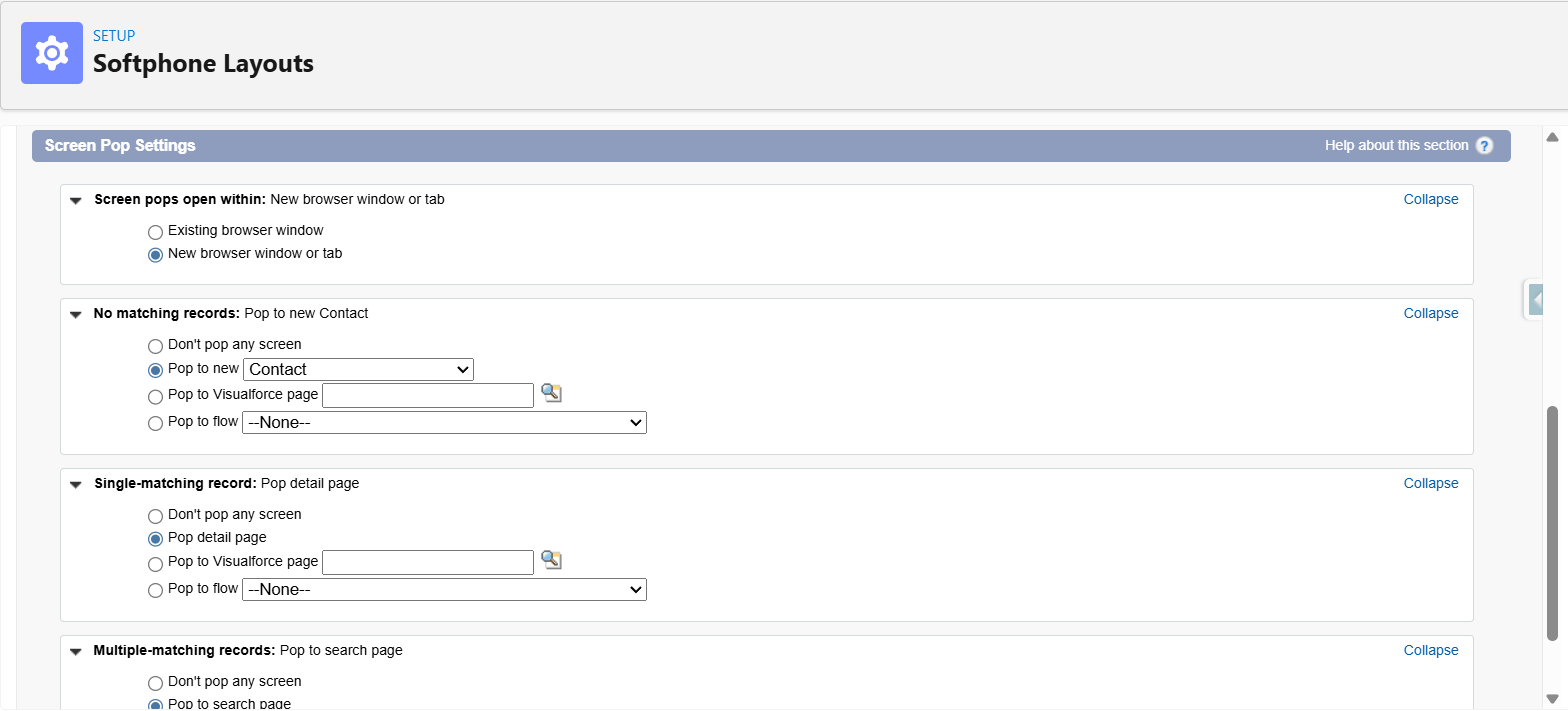
In the Screen Pop Setting: you choose according to the picture
Click Save to save the SoftPhone layout
Step 2: Assign the SoftPhones Layout to users
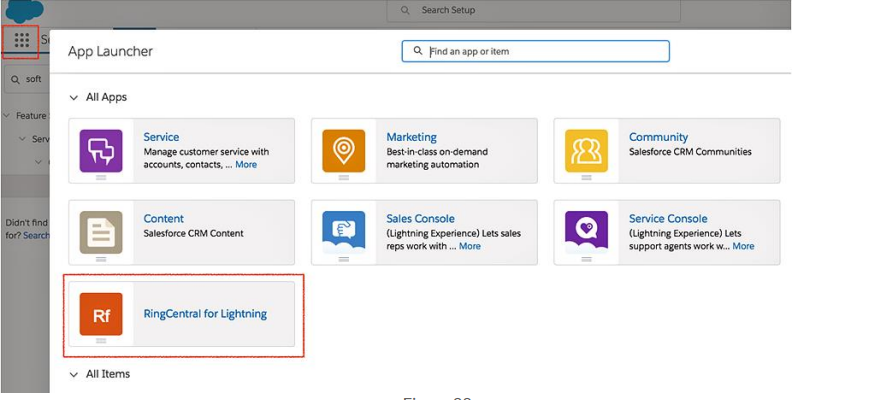
Now your basic installation and configuration is complete it's time to launch the RingCentral for Lightning app.The app can be accessed from App Launcher.
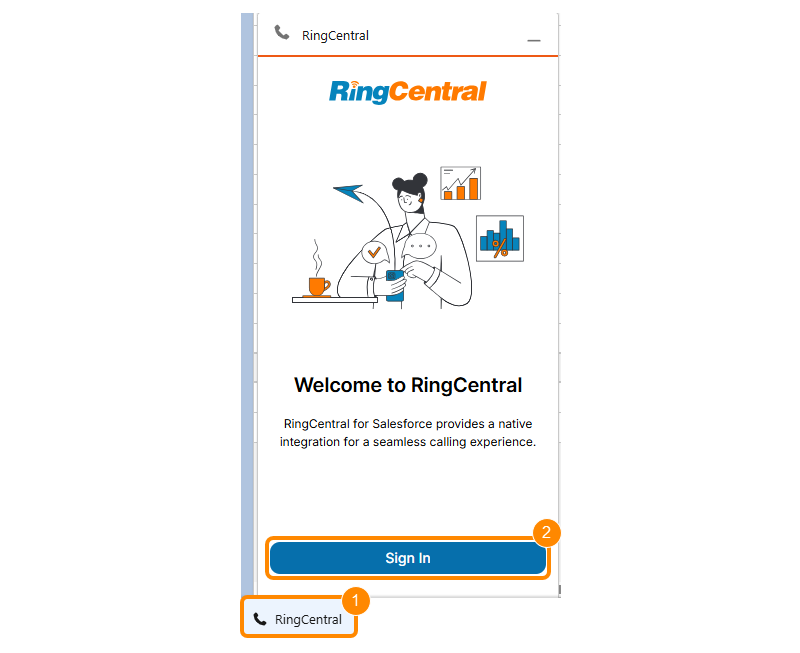
Accessing RingCentral for Salesforce
- Click the RingCentral widget at the bottom left of the page.
- Click Sign in.
- Sign in with your RingCentral credentials.
Managing call settings
- Click the Settings icon in the bottom toolbar.
- Click Calling.
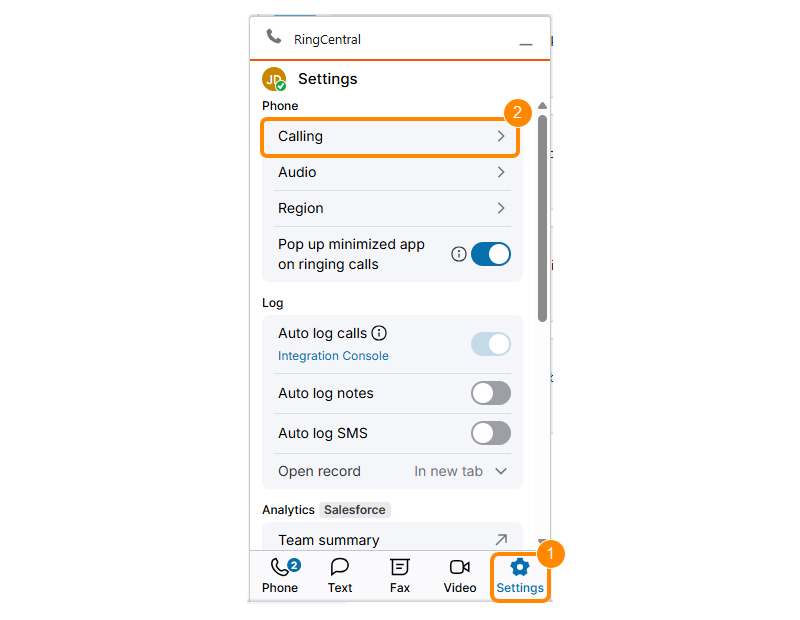
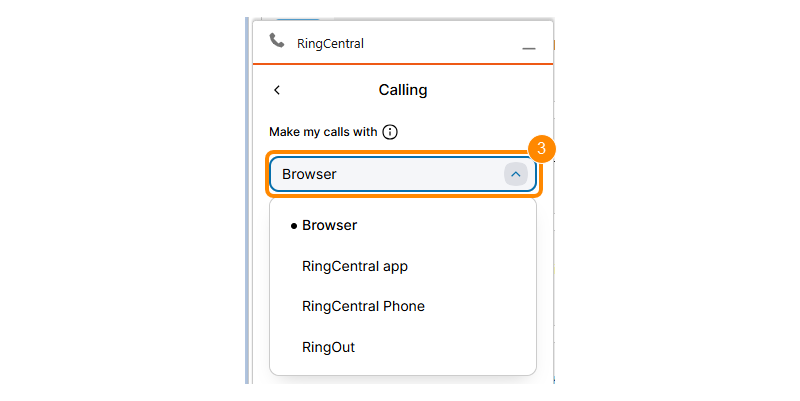
- Select a call mode:
- Browser (recommended): Your browser needs to support WebRTC.
- RingCentral app: Sign in to the RingCentral app on the same computer, using the same account as RingCentral for Salesforce.
- RingCentral Phone: Sign in to the RingCentral Phone app on the same computer, using the same account as RingCentral for Salesforce.
- RingOut: Use another phone device to make and receive calls.
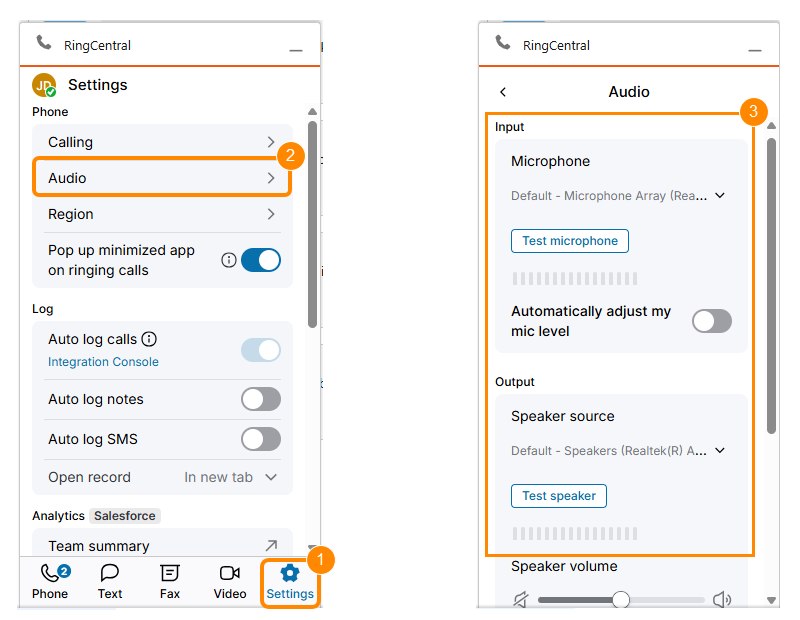
Audio settings
You can adjust your audio settings when using the browser call mode.
- Click the Settings icon in the bottom toolbar.
- Click Audio.
- Select your preferred microphone and speaker for calls.
- Click the toggle on or off to Automatically adjust my mic level.
If your browser blocks audio permissions, you can reinitiate the request. Click Check permission to allow browser access to your audio devices.
Using the phone features
The phone keypad is the app’s home page and where you’ll make outbound calls. You can use the keypad to enter a phone number or type the name or number. Select the **My caller **ID dropdown to update the number the call recipient will see.
Call history
Your recent calls will be available in the Calls tab of the phone. The app shows either the last seven days of your call history or your most recent 250 calls.
-
Click the Calls tab to view call history.
-
Hover over a recent call. If the call was logged, you can click View in Salesforce arrow icon to review the record. Other options include:
- Phone: Call the number back.
- Text: Send a text message to the number.

- Click a recent call in the list to view and update the details.
If the phone number matches a Salesforce record, those details will open when you select the phone number. If no match is found, you’ll have the option to create a new Salesforce record.
Making calls
RingCentral for Salesforce supports several ways to make outbound calls.
Click to dial
When you're signed in, phone numbers within Salesforce and on websites will appear as clickable links. Select a number to place a call using the RingCentral for Salesforce app.
If the Autofill Related-To in Call Log for Click To Dial option is turned on in the admin settings, the related Salesforce record will show on the call log page.
Call history
You can also call back numbers from your call or text message history list. When you select a number from the list, the matched record will show on the call screen.
Keypad
To make a call using the keypad, click a number or enter a name or number in the To field. If you click a number, the app lets you continue selecting digits. When you start typing in the To field, a directory search opens.
You can switch between directory sources to find a target record. After you enter more than three characters, the app will search Salesforce for matching records. The searchable record types are defined in the admin settings. Click a search result to start the call.
Receiving calls
When you use the browser call mode, you can answer calls directly within the app. If the call logging page isn’t currently open, the app will open it when there’s an incoming call. It will show the caller details and match results from all available directory sources, including the Company Directory, Salesforce records, and Personal contacts.
If you have a call log page open when you receive a new call, the app will show a notification for the incoming call. If you answer it, a new call log session will open.
Using call controls
When you receive a call, you’ll see the following options:
- Ignore call: Dismiss the call. The caller hears ringing, but you won't be notified further.
- Forward call: Send the call to a saved or custom number.
- Send to voicemail: Direct the call to your voicemail.
- Answer call: Take the call.
Active call controls
Once the call is connected, the following controls are available:
- Mute/Unmute: Turn your microphone on or off. You’ll still hear the other party when muted.
- Keypad: Open the keypad to send DTMF tones during the call.
- Audio: Select your microphone and speaker sources.
- Add: Add another individual to the active call.
- Hold/Unhold: Pause the conversation. While on hold, neither party can hear the other. Hold music will play, and the call status will turn orange.
- Transfer: Transfer the call to a number or contact from Salesforce, Company Directory, or Personal contacts. Enter the number, then select Complete transfer.
- Record/Stop/Resume recording: Manage the recording status. A system prompt plays each time recording starts. All segments are merged into one recording.
- If call recording is mandatory, this option is disabled, and the status is displayed automatically.
- Notes: Turn AI Notes on or off to transcribe your calls and generate call summaries.
The call record will appear if your calls are set up to be automatically logged.
Multiple call controls
When there are multiple calls on the app, you can switch between them. Click the Back icon at the top right of the active call page. All calls will be listed on this page, and you can switch between or merge them.
Checking voicemail
Click the Voicemails tab on the Phone page to check your voicemail messages. Listen to, download, or delete voicemail messages from this tab. You can also call or text the phone number back.
Logging calls
Calls can automatically generate a log or be logged directly from the app during an active call or from the call history list.
Auto log calls
Your admin can turn on the Auto log calls setting to automatically create a call log to the matched Salesforce record.
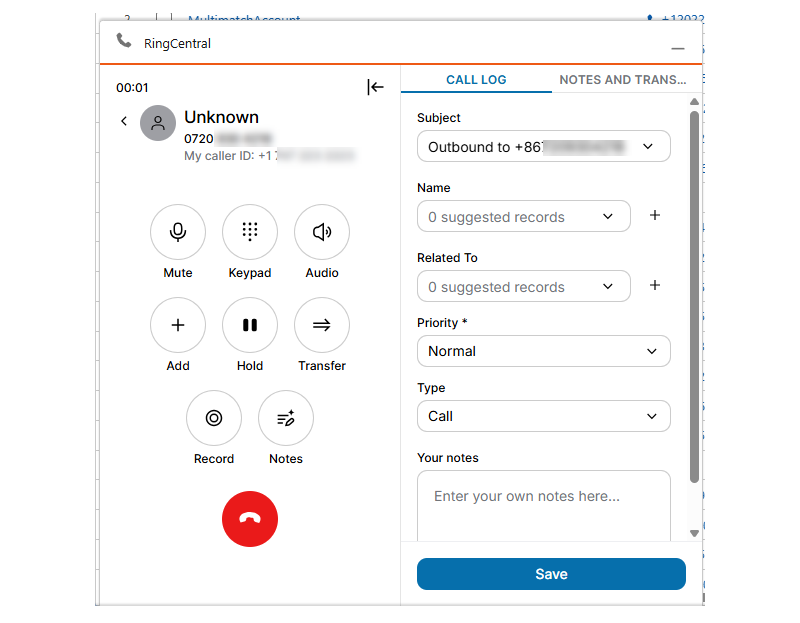
- When a call is made or received, the Call log window will automatically pop out, containing suggested records in the Name and Related To fields.
- If there are multiple matches, click the Name and Related To dropdowns to select the correct account information.
- Select a Priority.
- Select a Type of communication.
- Enter any Notes.
- Click Save.
Creating a new record
If a caller’s information doesn’t match an existing record, you can create a new one during or after the call.
- Click the Create record plus icon to the right of Name.
- Select New Contact or New Lead.

- Complete the details, then click Save.
- Click the Create record plus icon to the right of Related To.
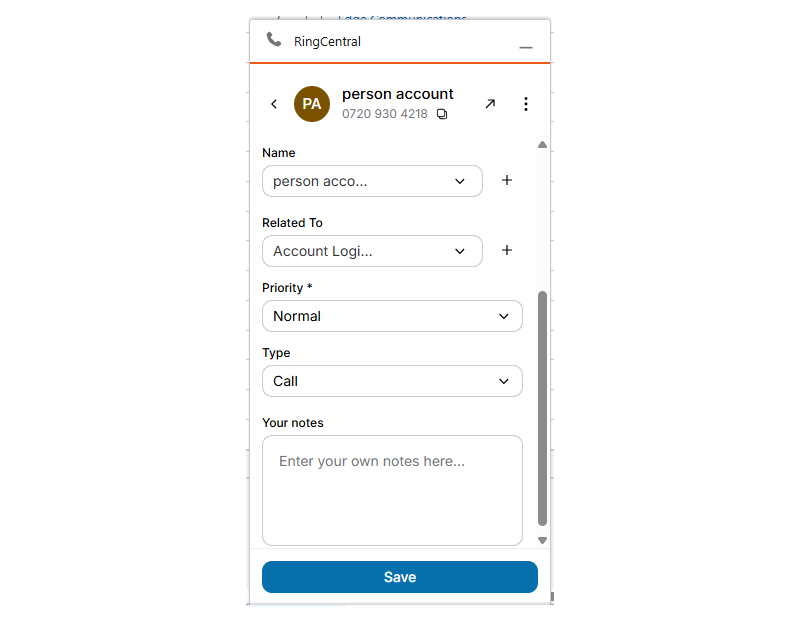
- Select an option:
- New Account: Select Business Account or Person Account, then click Next. Complete the details, then click Save.
- New Opportunity: Complete the details, then click Save.
- New Case: Complete the details, then click Save.

- Select a Priority.
- Select a Type of communication.
- Enter any Notes.
- Click Save.
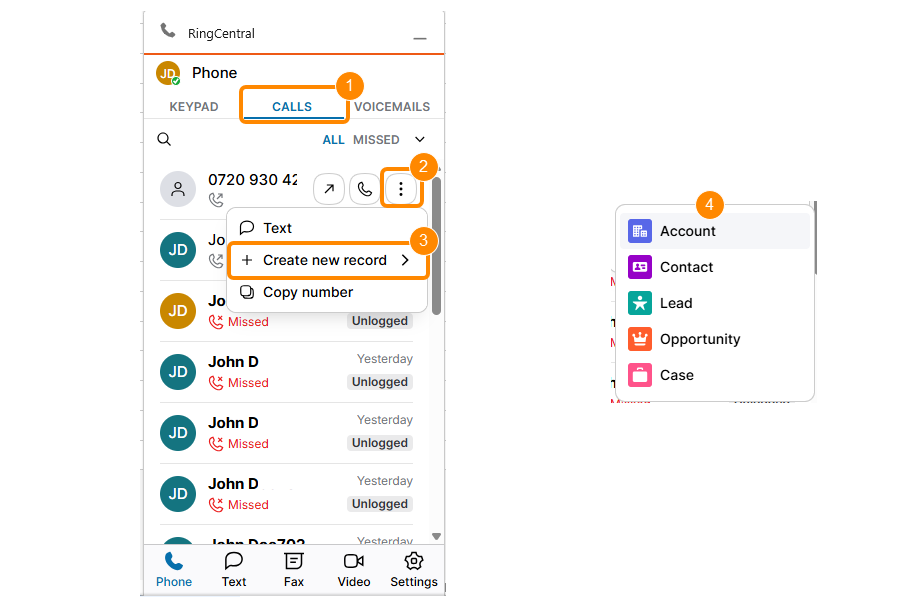
To create a new record from your call history:
- Click the Calls tab.
- Hover over the phone number in the list, then click the three-dot More icon.
- Hover over Create new record.
- Select an option:
- Account: Select Business Account or Person Account, then click Next. Complete the details, then click Save.
- Contact: Complete the details, then click Save.
- Lead: Complete the details, then click Save.
- Opportunity: Complete the details, then click Save.
- Case: Complete the details, then click Save.
Auto log notes
The Auto log notes setting is only available when Auto log calls is turned on. When this setting is on, all notes added during or after the call will automatically update the contact’s record in Salesforce.
Sending and receiving text messages
If your account is registered to send and receive text messages, you can use the Text feature in the app.
To send a new text message:
- Click the Text icon in the bottom toolbar.
- Click the Send new text icon at the top right.
- Enter a name or phone number.
- Type your message.
- Press Enter on your keyboard or click the Send message icon.
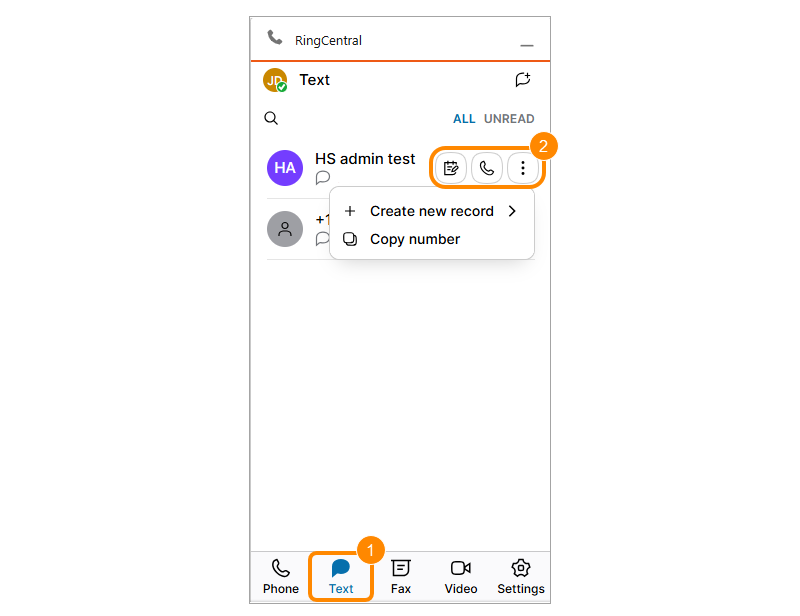
To manage, log, and reply to received text messages:
- Click the Text icon in the bottom toolbar.
- Hover over a message: a. Create log: Log the message to an existing or new record. b. Phone: Call the number back. c. More: Create a new record or copy the number.
- Click into a message.
- Type your message.
- Press Enter on your keyboard or click the Send message icon.
Auto log SMS
When the Auto log SMS setting is turned on, any text message interactions will automatically be updated in the contact’s record in Salesforce.
- Click Settings in the bottom toolbar.
- Click Auto Log SMS.
Sending and receiving faxes
You can view, download, or delete received faxes or compose a new fax in the app.
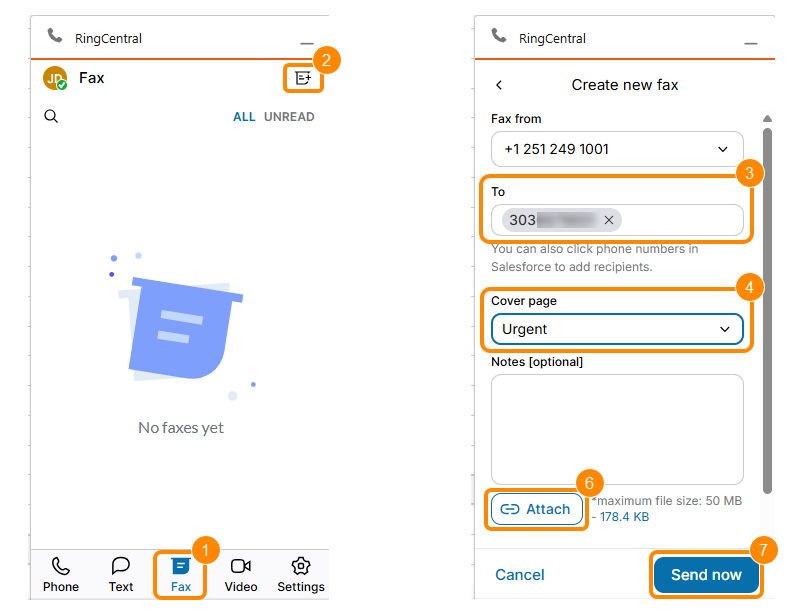
To send a fax:
- Click the Fax icon in the bottom toolbar.
- Click the Compose fax icon at the top right.
- Enter a fax or contact number.
- Select a cover page.
- Add notes (optional).
- Click Attach and select the file.
- Click Send now.
Conclusion
RingCentral integration with Salesforce empowers your sales team with tools and information that help them excel and scale up in the business environment. It translates to a smoother customer experience, increased efficiency, and ultimately, more closed deals.
By following the steps mentioned above, you can ensure a seamless integration of your Salesforce and business communication platform. However, if you face any difficulties and need assistance regarding the same, you can consult a Salesforce consulting company.